How to Build Small Dams - Design and Construction

Dams built up on small scale by compacting successive layers of earth, using the most impervious materials to form a core and placing more permeable substances on the upstream and downstream sides. A facing of crushed stone prevents erosion by wind or rain, and a suitable spillway, usually of concrete, protects against catastrophic overflow of the dam.
Small Earth Dams
Simple earth dams can be built where there is an impervious foundation, such as Un-fissured rock, or a clay subsoil. The channel upstream should preferably have a gentle slope, to give a large reservoir for a given height of dam. An ideal dam site is where the valley narrows, to reduce the width of the dam.
Design of Small Dams
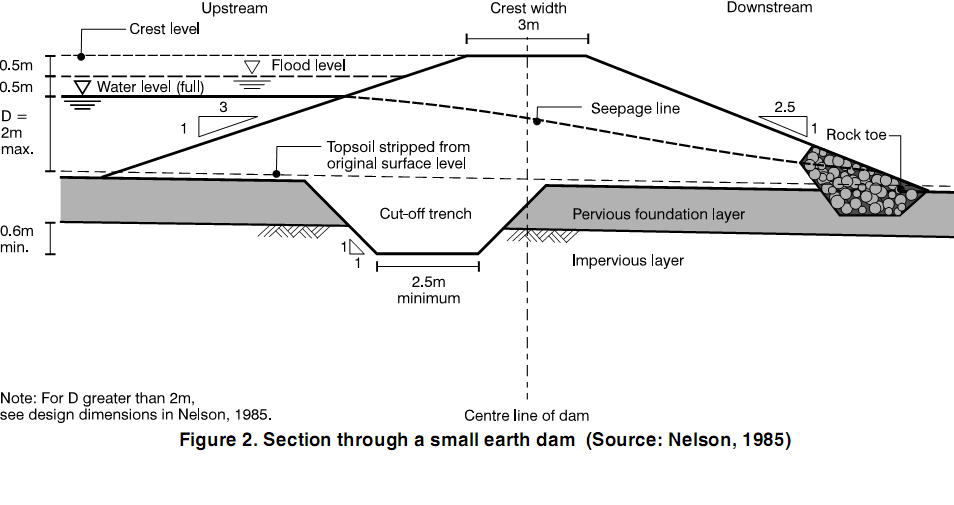
The design below is suitable for dams up to 3 m high. It is a uniform embankment of inorganic, clay loam soil, such as sandy clay loam, clay loam, silty clay loam, or soil with a higher clay content (sandy clay, clay, or silty clay). Any of these can be used provided cracks do not form. The dam must have a 'cut-off' which locks it into the subsoil foundation, ensuring that the dam is stable.
A 3m high dam would typically have a 2 m maximum depth of water when full, increasing to 2.5m under flood conditions, with a 0.5m depth of flow over the spillway. The top 0.5m (minimum) is required to provide a safety margin (free board) which allows for water rising on the dam due to wind and waves, and wear and tear on the dam crest. The total design height of the dam must be increased for construction by at least 10 per cent, to take account of settlement.
Calculating the height of the dam
The height of the dam will depend on the storage required in the reservoir. To calculate this:
- Determine the water requirement per day (R litres per day);
- Estimate the area of the reservoir (A m2), the evaporation and seepage losses per day (E mm per day) and, hence, the volume of losses per day (A x E liters per day);
- Estimate the length of the critical period (T days), during which the stream flow is less than the water requirement and losses, when requirements would be met using the storage in the reservoir;
- Estimate the average stream flow during the critical period (Q liters per day);
- The effective storage required (S litres) = (water requirement per day plus evaporation and seepage losses per day minus average inflow per day) multiplied by the length of critical period:
S = (R + AxE - Q) x T
The dam must be high enough to store this quantity of water. The storage capacity of the reservoir (C liters) is best determined from cross-section surveys across the valley, but can be estimated from the area of the reservoir (Am2) and the maximum depth of water at the dam (D m) when full:
C = 330 A x D
The site should then be surveyed to estimate the area (A) of the reservoir for different values of D, and a trial-and-error method will then give the reservoir capacity (C) which meets the storage required (S) and provides a safety margin. The resulting value of A should then be used in the calculation of S to obtain a consistent result.
Height of dam = D + 1 m.
Construction of Small Dams
The materials should preferably be taken from the reservoir area; different parts of the side of the valley should be examined so that the most suitable soils are located (soil textures will vary according to position in the valley). The following materials should be avoided: organic material - including topsoil - decomposing material, material with high mica content, calcitic clays, fine silts, schists and shales, cracking clays, and sodic soils. Avoid material with roots or stones.
Other construction points to consider:
- Construct during the dry season.
- Divert the stream; block it with a temporary low dam, or divert it through a culvert (which could become part of the outlet works or spillway later).
- Strip topsoil because it contains organic matter (such as roots) which prevents proper compaction and may provide seepage routes (piping) once the organic matter has decayed.
- Pay attention to people's safety - avoid hazardous practices and dangerous equipment.
- Place material in the dam:
- In layers 100 to 200mm deep;
- At the optimum moisture content - when material can be rolled to pencil thickness without breaking, and is as wet as possible without clogging the roller; then
- Compact with a heavy roller, or by driving across vehicles or animals.
- Cover the whole dam with topsoil:
- Plant strong grass (such as Kikuyu grass, star grass or Bermuda grass) to protect against erosion;
- Maintain the grass (water in the dry season if necessary), but prevent trees taking root, and keep out animals such as rats and termites.
- Protect the upstream slope:
- Lay a stone or brush mattress (for example bundles of saplings between 25 and 50mm long) on the slope, and tie it down with wire anchored to posts;
- Secure a floating timber beam 2 m from the dam - these need replacing every 10 years or so.
Settlement of Dams
Even with compaction, earth dams settle as the weight forces air and water from voids (consolidation) - allow for this settlement in the design. For small dams, well-compacted settlement should be between 5 to 10 per cent of the height of the dam.
Seepage/filter
Some water will seep through the dam, even if it is constructed of good materials, and well-compacted. This seepage reduces the strength of the dam. Nelson recommends the crest width and slopes shown in Figure 2 to provide a stable, 3m-high embankment making extra seepage protection unnecessary. A safer, but technically difficult, solution is to include a rock toe drain (as shown), to collect seepage water. This should extend up to a third of the height of the dam, and a graded sand and gravel filter must be placed between the dam fill material and the drain to prevent fine clay particles being washed out. The filter must be designed according to the particle size of the dam material and the drain.
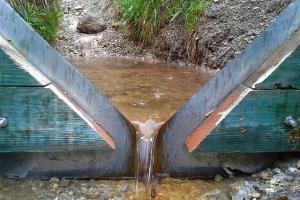
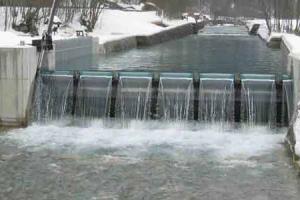
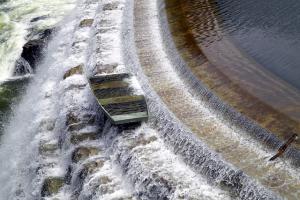
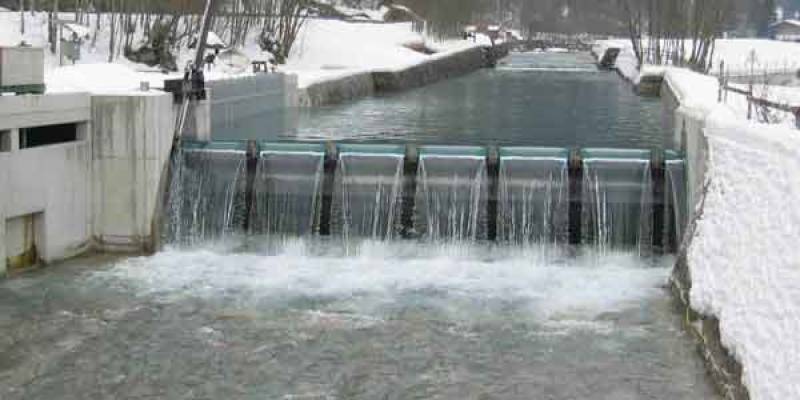
Spillways
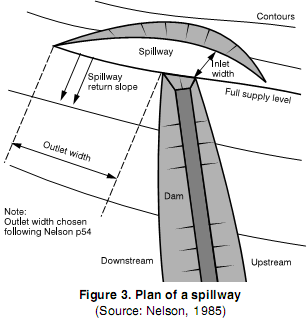 A spillway is required to protect the dam from over-topping, for example during high flows. It passes surplus water downstream safely, preventing both the failure of the dam, and damage downstream.
Surplus water flows over a spillway crest at the top water level, and into an open channel around the side of the dam, discharging safely into the stream below the dam. It may be made from reinforced concrete, but a cheaper solution is a grassed spillway with a:
- Vegetated earth channel
- Protected crest at reservoir top-water level
- Maximum velocity 2.5m/s